
table of contents
Part 3 of this OBS F350 restoration moves us onto the suspension under the truck. Even though it was a rust free, one owner truck when we picked it up, it’s still plagued with a miserable ride like all this solid axle Old Body Styles had. The short leaf springs and shackle at the front of them makes for an extremely
rough ride, but luckily the aftermarket has plenty of options and the Super Duty Reverse Shackle Kit from Sky’s Offroad is always our go-to. Some would find it fair to suggest the Front RSK swap is the ‘number one must have OBS mod’, with an intercooler package coming in a close second.
This truck was miserable to drive down the highway and rode so rough on dirt roads, like bad enough we almost didn’t want to drive it when we didn’t have to. This was partly due to the old school leveling kit the previous owner had installed, but even on factory springs these trucks just ride badly, that’s all there is to it. Sky’s Offroad Design in Springfield OR has been specializing in just about everything suspension related for a bunch of different applications since 1997. Through the years they developed a complete Reverse Shackle Kit for the 1992-1997 solid axle F250/F350 trucks, and it’s been a home run. The idea behind an RSK is to completely replace the factory front suspension with new hangers that relocate the leaf spring shackle to the rear of the springs, which allows for better suspension travel and ease of spring movement so it can cycle up/down with less resistance. Working in conjunction with a set of 1999-2004 Super Duty leaf springs, which are 4” longer for improved ride quality over factory OBS
springs, the new shackle angle can virtually eliminate that bone jarring buckboard bounce and stutter.
With no immediate plans of stepping up to a larger tire, we wanted to actually drop the stance of this truck from its current 3” leveled height and get it down as close to the original stock height as possible We opted to go with the Sky’s 2” Super Duty RSK kit, which when used with the popular V-code Super Duty springs will give a stock 1992-1997 F350 a mild 2” lift. Looking to go a little more outside the
ordinary, we tracked down a less common U-code spring for an even softer ride. The U-code was used in Excursions, which has a slightly lighter load capacity a little less arc to the spring for a lower stance than the pickup trucks had. This combo of RSK and leaf spring would offer the lowest stance we could get for
the solid axle four wheel drive front end. It is worth noting here, for those of you wanting an actual lift, the RSK’s are offered in a 2” and 4” system and could be used with just about any height 1999-2004 spring pack available to get you the final height you’d prefer, whether that be a 6” or 10” lift.
RSK kits have been on the market for quite a few years now, so this isn’t really new technology in the Ford suspension world, and some places, including Sky’s, even offer coil conversion kits that allow the installation of a 2005+ Super Duty coil sprung suspension to be installed in an OBS to completely rid yourselves of the front leaf spring setup all together. We liked the idea of staying leaf springs, be it
nostalgia or the need for sourcing the smallest pile of parts. We liked the idea of getting a tried and true suspension to work a little better. Sky’s spent a lot of time developing this 2” kit for the market and it shows. With the low profile shackle and newly designed rear hanger, moving the hanger mount location
further forward on the frame, the shackle can lay back more for an improved ride over just hanging a new shackle from the factory rear hangers.
You’ll want to be prepared for this to be a very labor intensive installation, however. Removing the factory hangers isn’t for the faint of heart and a grinder, high power air hammer, healthy impact gun and maybe even a cutting torch is going to be needed. The factory hangers use large steel rivets that need to be cut and punched out of the frame and 20+ years’ worth of hard roads, rust, and grime are going to make this disassembly a fight to the finish. While the use of a two post hoist and high dollar specialty tools would’ve helped on the labor side of things, we did accomplish this swap with jack stands and floor jacks in a garage. It wasn’t easy and took a lot of patience and problem solving, the end result was well worth it. You’re going to want to set aside at least a full weekend or more, depending on how much removing that factory stuff fights you. But don’t let all that scare you out of getting this RSK swap done. Once the stock parts are out, the new Sky’s kit installed easily and required no modifications or trips to the hardware store. The instructions are easy to follow, and they went together like they were supposed to. There are holes you’ll need to drill in the frame for the front crossbar and hanger mount, but the right step bit makes this pretty easy to accomplish. We opted to install the optional adjustable track bar with our kit along with new Monroe shocks, as the Rancho’s that were on it were for the 3” level and pretty well worn out.
We lost count of how many hours we spent tackling this job, as we had the luxury of spanning it out a couple of weeks, only focusing an hour or two here and there every couple of days. We can assure it was worth every curse word, broken cutoff wheel and the giant mess we made on the floor from so much grinding. It’s hard to put it into words how much better this truck rides with the RSK installed. This
combination of Super Duty leaf spring and rear shackle will make you completely forget it’s still riding on leaf springs. It handles bumps in the road like it’s nothing and soaks up the big bumps, like rough railroad tracks, like they aren’t really even there. The truck is just so much more enjoyable to drive and ride in, you kind of forget it’s still 20+ years old. The suspension swap really brought its life back, it’s
really something you just have to feel to fully appreciate. If you’re on the fence about doing the swap or have an OBS you just don’t drive anymore because it rides too rough, take a few minutes to surf through CPAddict.com and order up a Sky’s Offroad RSK, you’ll thank us later.

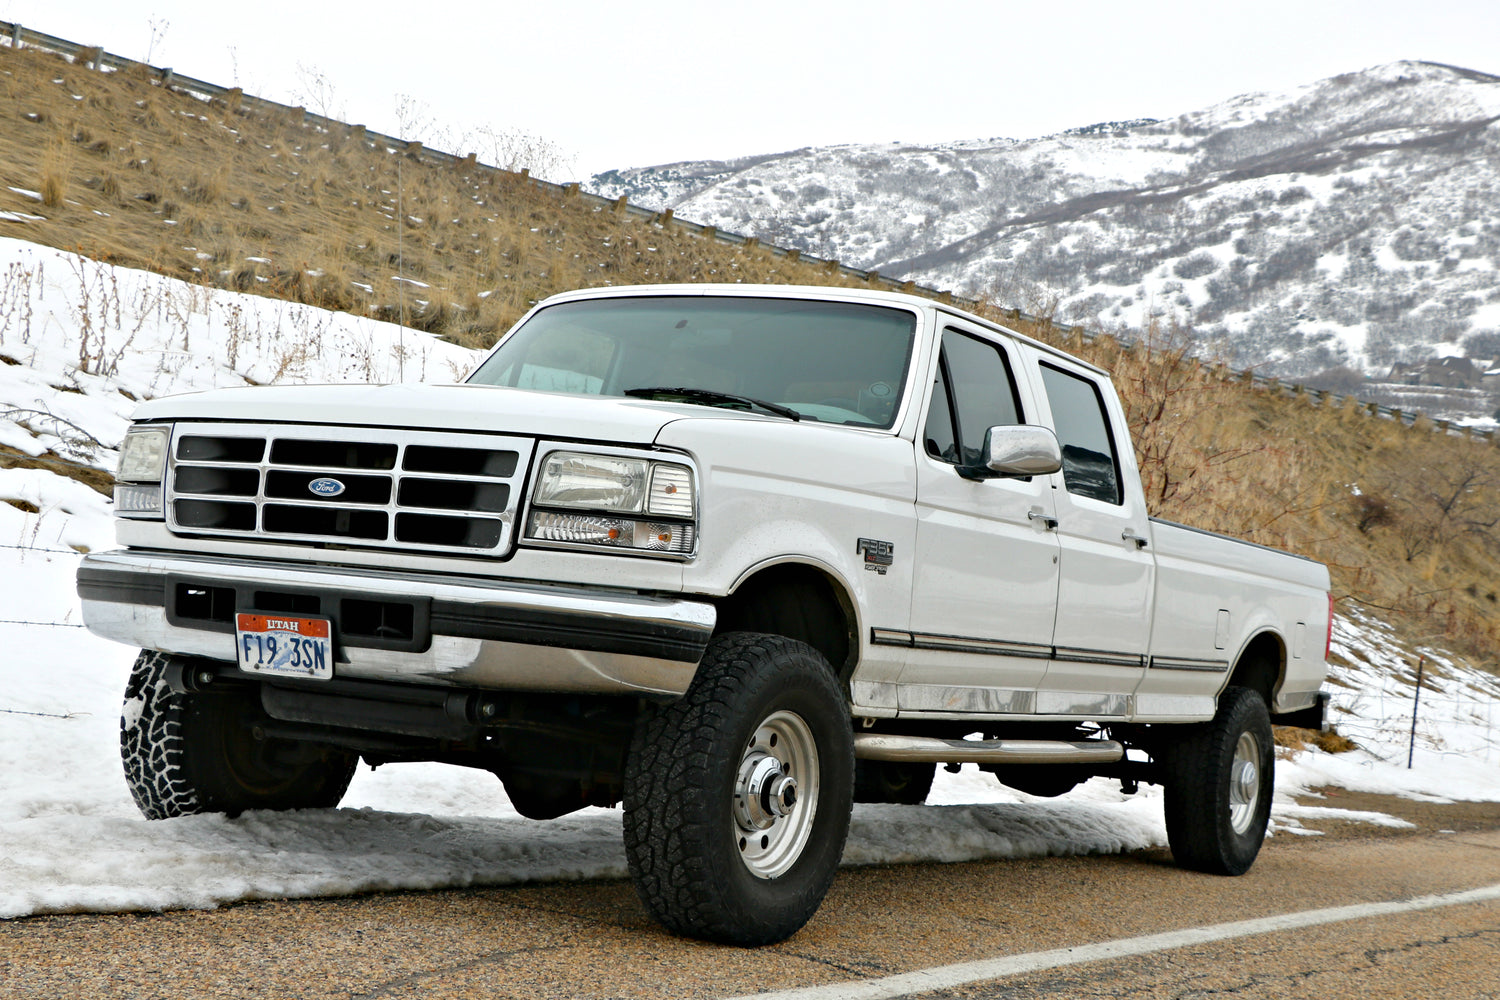
01 – While it may not look like much, the 2” (Superduty Spring) Reverse Shackle Kit from Sky’s Offroad, paired with a set of OEM leaf springs from a 1999-2004 Ford Super Duty might be the best modification you can make to an old 1994-1996 F350 truck. Improved ride quality is an understatement.

02 – The 1994-1997 Ford F350 trucks equipped with the Dana 60 front axle use an antiquated leaf spring suspension that placed the shackle at the front location and a solid eyelet to attach the rear of the spring. On top of this shackle design, the short leaf spring length offers a lot to be desired for ride quality, as the suspension can’t fully cycle as it should while driving.

03 – As the suspension needs to cycle up or down, that front shackle design requires the leaf spring and axle to swing forward. But you don’t need a master’s degree in engineering to understand why that doesn’t work well when traveling down the highway at speed. Physics wants that motion to go the opposite direction, leading to a harsh rough riding pickup.

04 – Installing a Reverse Shackle kit can make a vast improvement in ride quality, but thanks to the OEM design and mounting fasteners used (big steel rivets) and over 20-years of age and rust, be prepared for this to be a very challenging job. This is a major undertaking in a garage, without a hoist and you’ll want to be sure you have a large assortment of tools. An air impact gun, grinder, air hammer, multiple jack stands and jacks and possibly even a cutting torch.

05 – This truck had an old school leveling kit installed at some point which simply added a larger min-leaf pack under the factory leaf springs. While this did add some space between the axle and frame for about a 3” lifted stance, it did nothing but kill what suspension flex you’d get from the factory springs.

06 – There wasn’t a rust penetrant on the planet that was going to make removing these U-bolts an easy task, so we went right for the cutoff wheel on an angle grinder. This is a tool you’ll get very familiar with throughout this front suspension job.

07 – After removing the axle U-bolts and lowering the axle down a bit, we could move on to removing the factory springs from the truck. It didn’t take long to discover totally destroyed bushings as we pried the shackle out of the frame mount. Just one more reason to look forward to the Sky’s RSK installation.

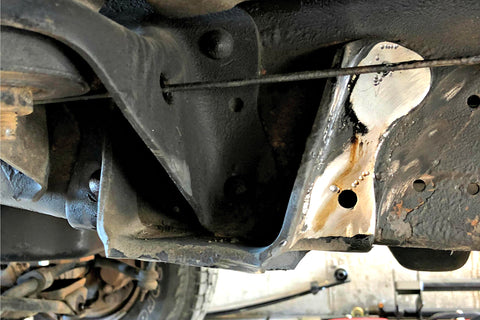
08 – On the rear eye bolt, our 550-ft lb. air impact wrench wouldn’t break the nut loose, but it didn’t have any issues snapping the bolt right off flush with the hanger. After some penetrating oil and time with an air hammer, we determined that the seized bolt was never going to budge and once again had to turn to our trusty grinder.
09 – With no other option to remove the spring pack from the hanger, the grinder was used to simply cut that hanger bracket in half, leaving the lower half still attached to the spring pack. We then had to turn our attention to removing the six steel rivets attaching the other half of the bracket on the frame. The grinder and a high quality air hammer make short work of that task.

10 – With the original spring pack on the floor, we could lay it alongside our new Super Duty F250 spring pack. Obviously, you can see the difference in thickness (two leaves vs. eight), but you can also see the additional 4” length in the Super Duty spring. The added length and moving the shackle to the rear of the spring will help a bunch when it comes to soaking up bumps.

11 – For this project, we wanted to keep the ride height as close to a factory F350 as possible, so we paired the Sky’s 2” RSK kit with a U-Code leaf spring from an Excursion. This spring offers the softest and lowest arch compared to the more popular V-code springs used under the F250 trucks. The downside to the U-code spring is a lower weight rating, so heavy tow rigs will want to stick to the V-code.

12 – After powder coating our 2” RSK it was time to reassemble the truck. Sky’s Offroad includes all new hardware with their kit, but drilling will be required. The rear hangers bolt into factory holes in the frame (you’ll need to enlarge the holes to fit bigger bolts). The front crossbar hanger will locate off the factory shackle hole in the frame, but the remaining holes (six per side) will all need drilled. Buy a stepbit for this and thank us for the tip later.

13 – Little tough to make a real comparison of the rear hangers since our factory ones had to get cut in half to be removed, but the new Sky’s brackets move the leaf mounting location down and forward some in order to give the new shackle the proper geometry and angle for the best ride quality.

14 – Comparing the short shackle Sky’s uses in their 2” (4” RSK available) kit to the factory shackle. Sky’s does include all the bushings and hardware required for this job. So, don’t worry about having to reuse any of the original worn out stuff.

15 – With the front end pretty much gutted and the suspension ready to go back together, we first took some time to prep the surface of the frame, axle and shock mount so we could spray a quick coat of undercoating on everything. Twenty years of snow and mud had created pretty ugly surfaces, but luckily for us everything was solid and free of real rust damage.

16 –Using the included instructions from the Sky kit, we were able to rotate the bracket on the frame to its proper location and mark and drill the holes to secure it to the frame. Three bolts outside and three inside the frame. This kit did work with our previously installed intercooler kit as well.

17 – The rear hanger bracket installed easily with six grade 8 bolts holding it to the frame. We made sur to grease and anti-seize the bushings and mounting hardware on the shackle and were then able to loosely bolt it all together to hang the new springs from the frame.

18 – Once both sides of the job were complete, new axle U-bolts were installed, brand new shocks for the right height and the optional adjustable track bar were last before we could put the tires back on. We backed it out of the garage and cycled the suspension a couple times to get it to settle out some and the shackle angle should really help improve ride quality.

19 – While this is marketed and used as a 2” leveling system, which assumes your use of the Ford V-code spring. With the use of our softer U-code springs, we only gained about one inch of height over a stock F350. This new stance is two inches lower than where the truck had been sitting and makes the 285/75R16 on the factory Alcoa wheel look right at home.


